Building a Set
A blog post by Veronica Krawcewicz, Senior Production Designer.
To date most of Onlea’s courses have been filmed in front of a green screen. We wanted to do something different for an upcoming course. Since a couple of our design staff have backgrounds in Industrial Design, we had the skill set on hand to build a set. This blog post will be about the process of refinishing theatre flats for use as video backgrounds.
For those who don’t know, theatre flats are 4’ by 8’ vertical structures often composed of one sheet of plywood (or fabric canvas) and usually framed with 3” x 1” lumber. They are used in the backgrounds of plays and movies.
We were lucky enough to be given six theatre flats from W.P. Wagner High School. If you are looking for some free ones, there often are schools, escape rooms, and individuals looking to off-load their old ones. They also aren’t that difficult to build.
Refinishing the flats
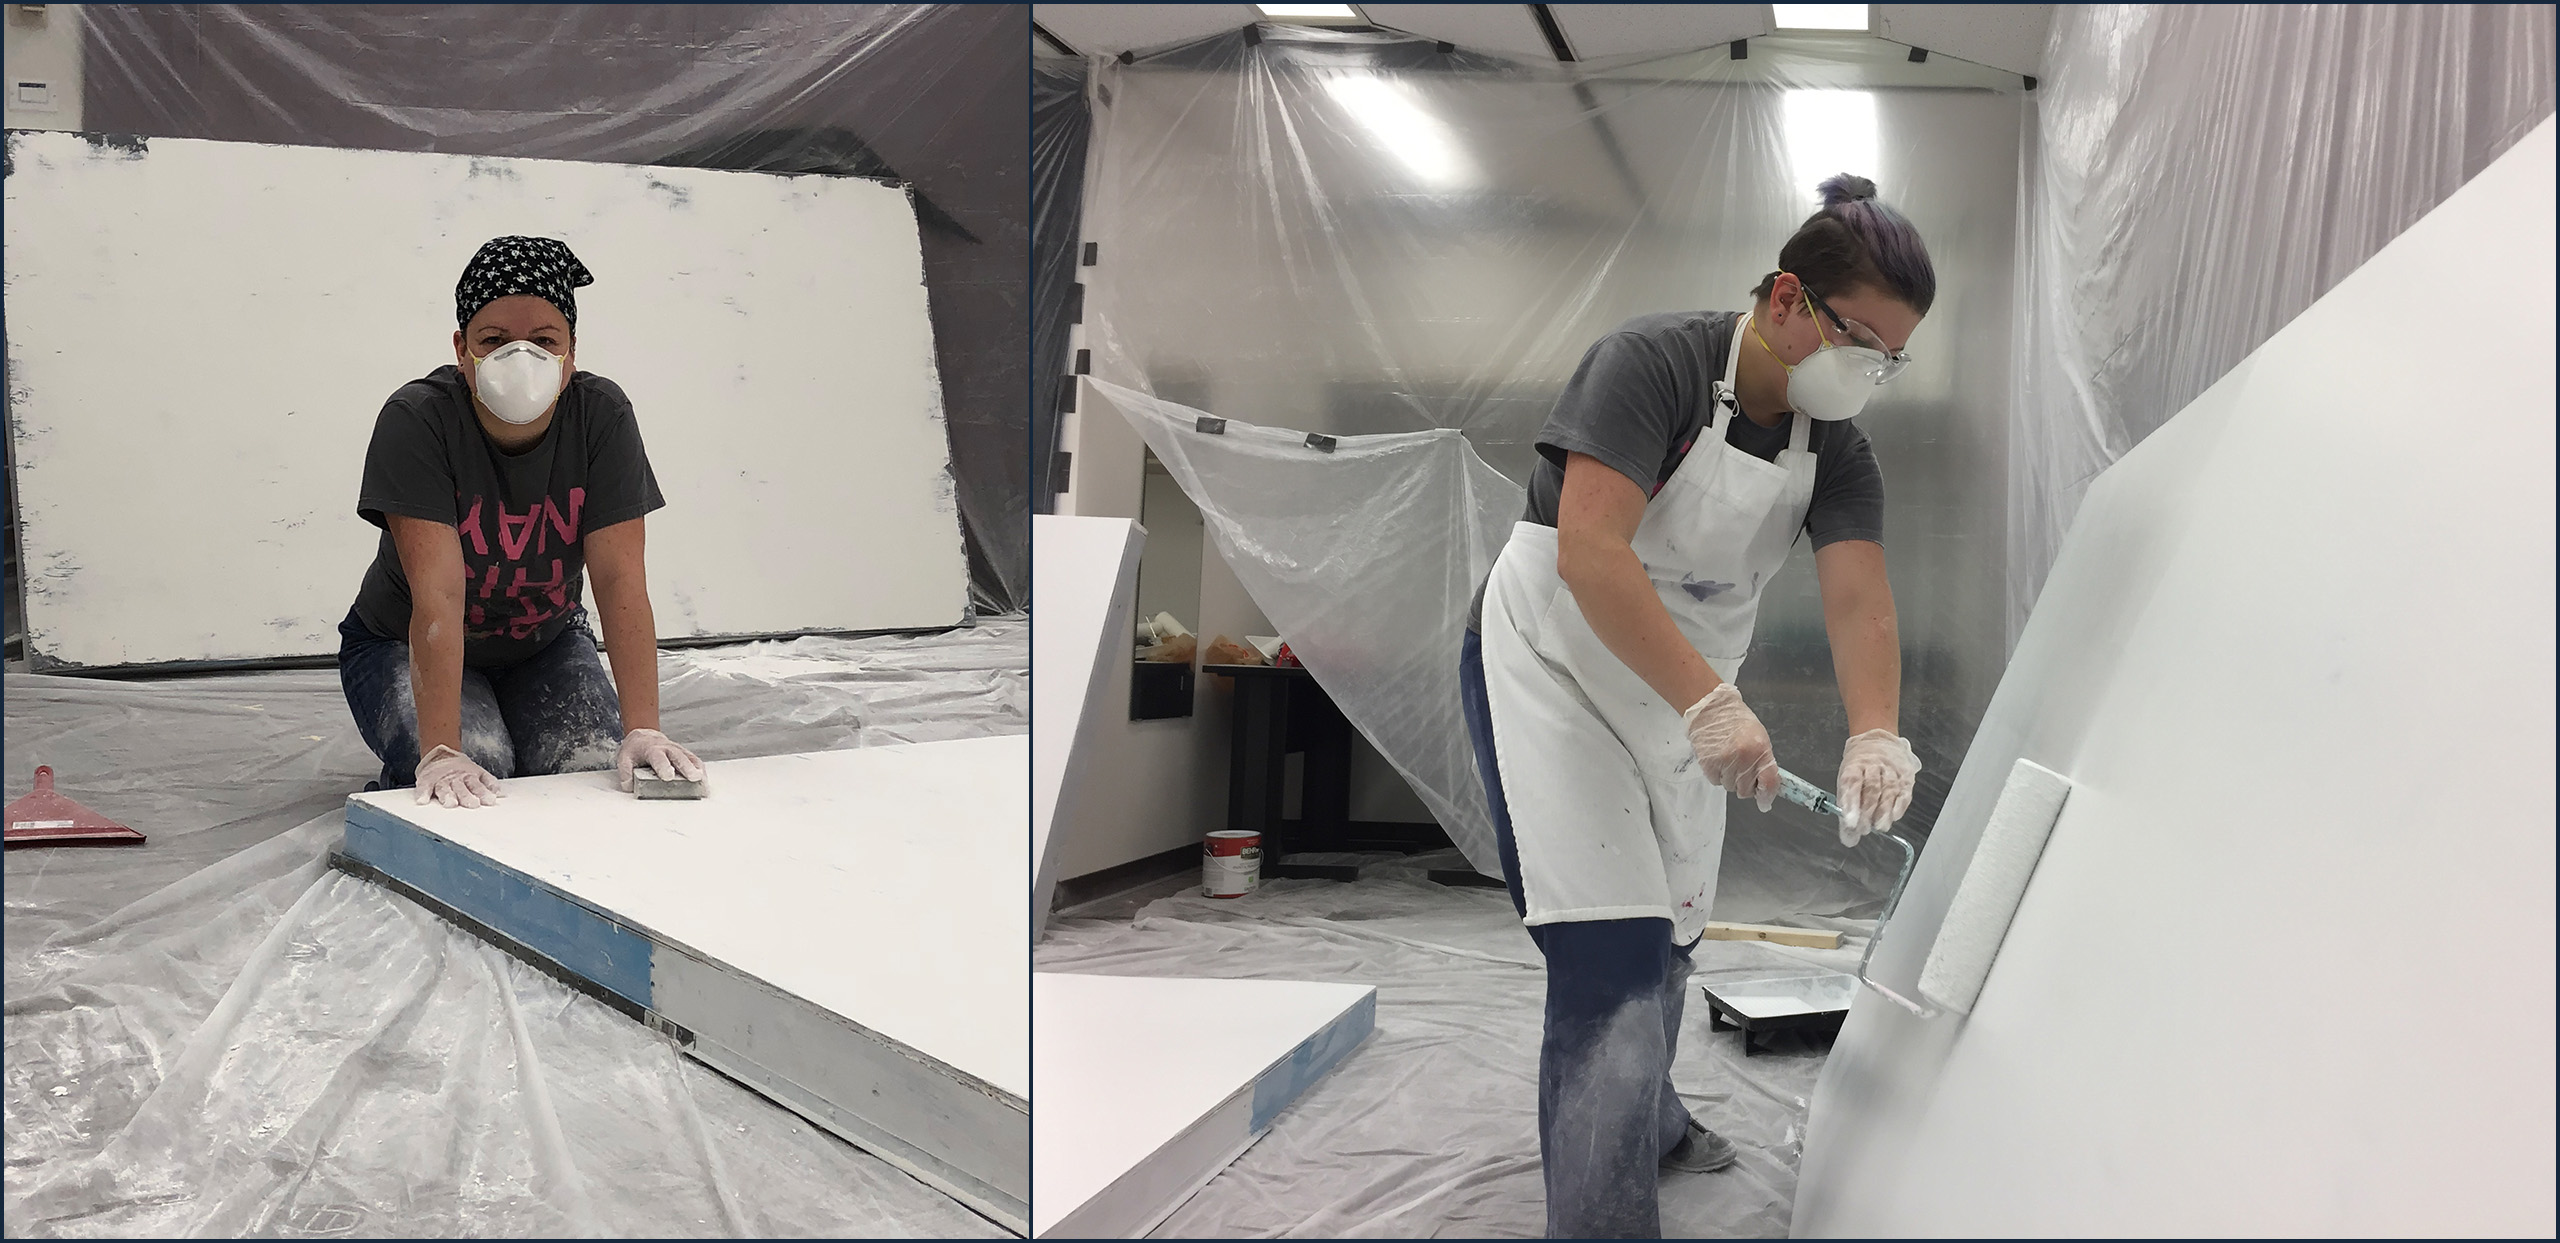
The plywood on these flats was a very knotty pine. Their past use in school plays was visible through numerous layers of paint, some slight cracking, and various types of glue adorning the surface of one of the flats. The glue had to be removed and the flats refinished. We needed to make these flats to look like a regular wall.
If the flats had not had hardware (screws) on the surface, the first step would have been to try to sand the existing surface flatter. However, due to the screws, we chose to build up the surface instead. It took three pails of drywall spackle to coat all six flats. I am personally a fan of DryDEX since it changes colour when it dries. Do not try to sand the spackle before it dries, it will crumble instead of sand away.
After the spackle is dry, sand it down using approximately a 150 grit sandpaper on a block, or a sanding sponge of a similar grit. Rougher sandpaper (ie. 60 or 100 grit) removes material faster but will also leave you with it’s own surface scratches. Less rough sandpaper (ie. 240-400 grit) will take you more time. If you have time to invest and want a really nice finish you can start with a 120 grit, then progress upwards to a 180, then 240, then 320 or higher to get a really smooth finish. But these are theatre flats, not lovingly handmade wood furniture, so the extra effort won’t be as appreciated. Also, sanding blocks are generally preferred to sanding sponges for a flatter finish (as a sponge might compress were you don’t want it to), however, again these are just backdrops not the focal point of your video.
Tips for sanding spackle:
- Wear a dust mask. A proper dust mask. This means it needs two straps and a bendable nose piece. Adjust it properly to make sure no air is leaking out/in around the edges. If you wear a cheap dust mask, or don’t adjust it properly you’ll just be breathing in the particles harder; which is just as bad for you as not wearing one.
- “Dexter” the room. Spackle dust belongs to the same category of material as glitter and little pieces of foam; it gets everywhere any you’ll still be finding it half a year later in the weirdest places. But it’s worse since it really gets airborne. So buy a bunch of plastic sheeting and cover your walls and floors and seal the edges with tape.
When your flats are nice and smooth it’s time to prime! Now most paint has primer built into it, however, I still recommend using primer first. Spackle can be thirsty stuff, so if you start with paint you’ll use up more of that expensive paint faster. Also, primer can be better as filling any extra remaining imperfections that the paint can. If the final colour of your flats is going to be exceptionally dark, tint your primer. This will also save you time, effort, and paint. The most transparent colour is red. I’ve heard of people having to paint a wall eight times when they were painting it red (I use to work at the paint department of a hardware store during university). So, if your painting red, prime pink (or grey sometimes also works).
Now you can finally paint! If you are interested, here is some information on proper painting technique.
Building Feet
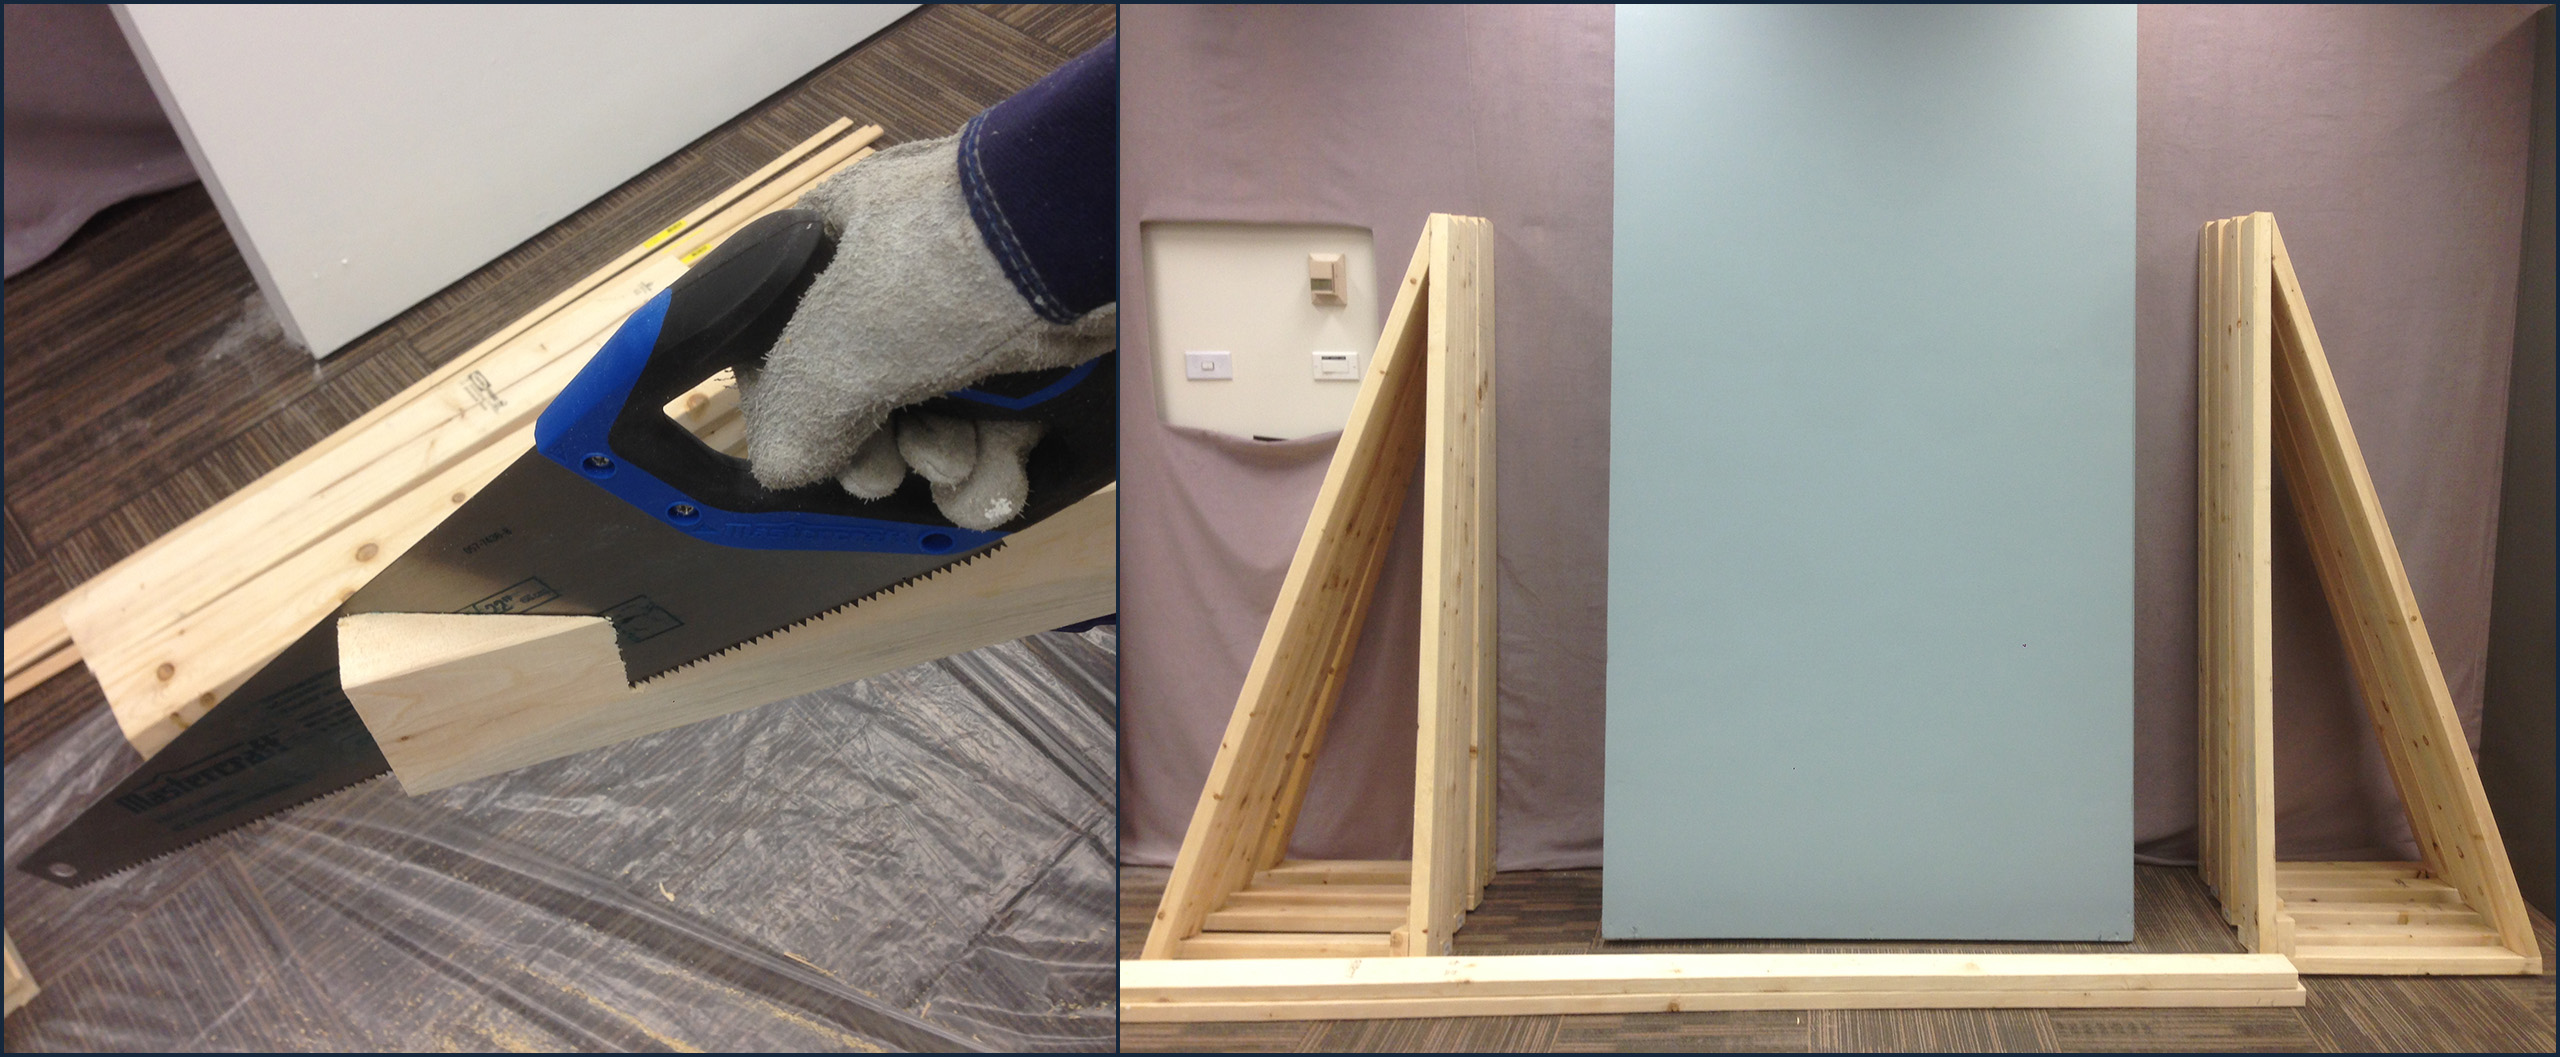
None of the free flats we found came with feet/braces. There are a few different ways of securing your flats in a vertical position. We chose to build braces and weigh them down. It’s also possible to anchor them to a wall.
A brace has three parts (it’s a triangle). The vertical piece that’s going to get screwed into your flat is called a stile. It should be 2/3rds of the height of your flat. The horizontal piece that runs along the bottom is called a rail, and needs to be 1/4th of the height of your flat. The angled piece is called a jack and this piece should be 5/8th of the height of your flat. You can also add a support piece in the middle.
Tips when building objects out of wood:
- Measure twice, cut once, and (sometimes) sand to fit. Also account for the thickness of the blade (saw or other implement) that will be cutting your wood in two pieces.
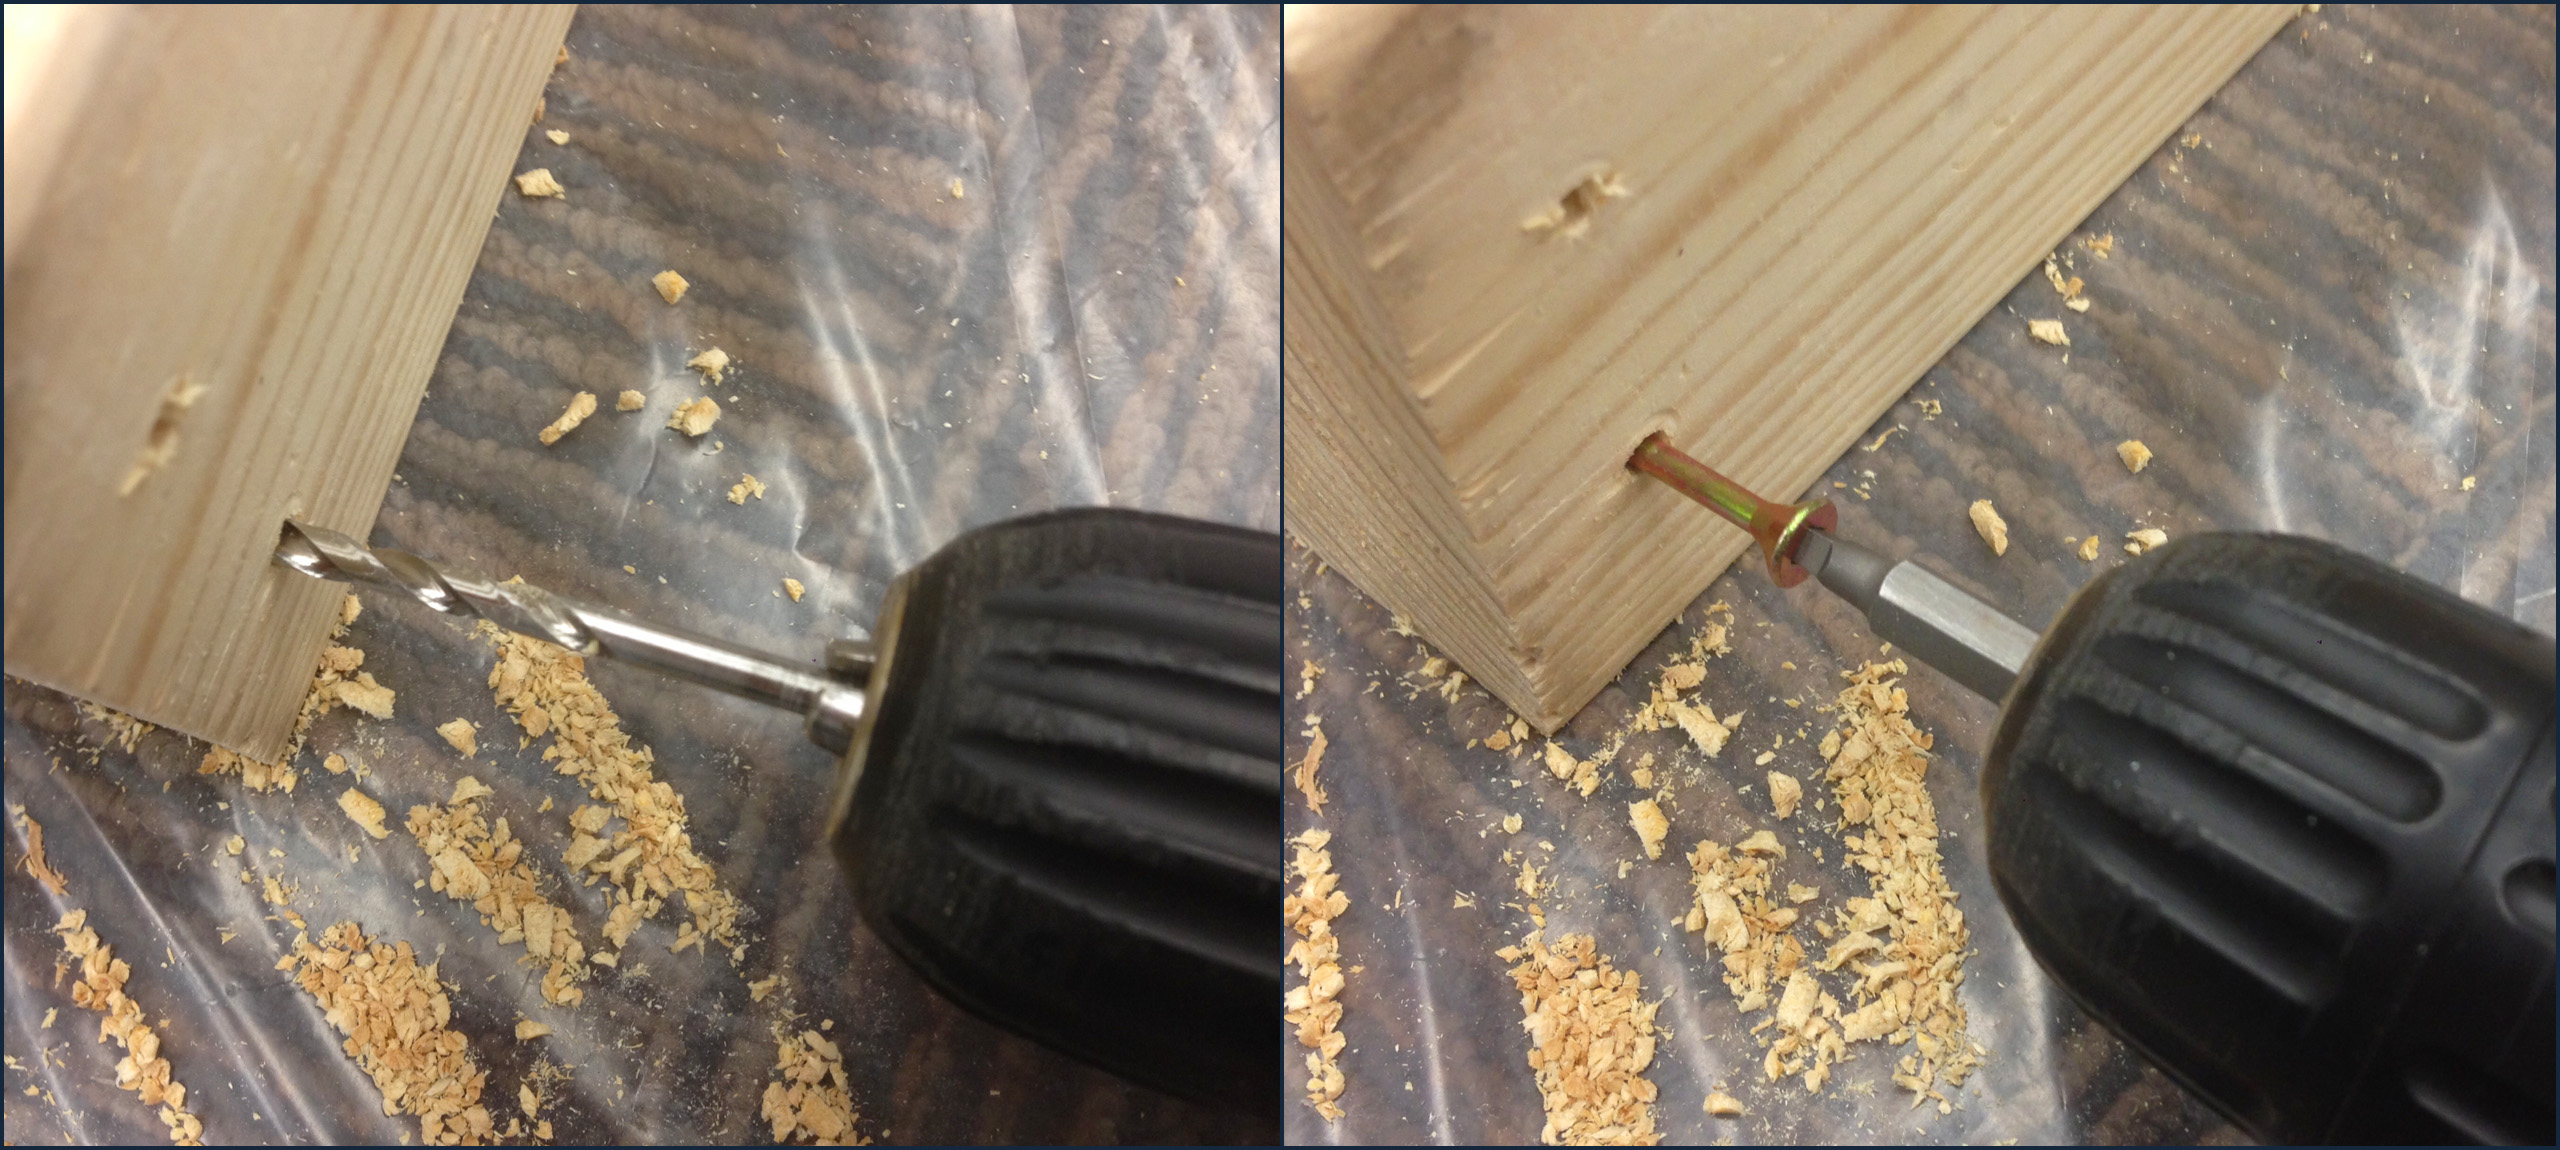
- Use screws not nails. Screws are easier to remove, which is very helpful if you ever want to take those feet off when you’re putt the flat in storage or transporting it. Screws also don’t get loose like nails can.
- Pre-drill your holes! A screw has two parts, an inner shaft and the he spiral threads. Pre-drill your holes to the width of the inner shaft of your screw. If you don’t your wood will split.
- Use wood screws. There are different types of screws. Wood screws have flat heads that bevel down into the shank (so they can be countersunk into the wood). Metal screws have rounded heads, with a hard cut between the head and shank (since the metal doesn’t have any give to compress at the connection point). Drywall screws look a lot like wood screws but are black and there is probably something different in regards to the threading.
- Use clamps. Clamps are your best friend. They will hold piece together in the correct position better than your best friend can.
- If you are making the same piece a number of times, it might be useful to use/make a pattern, template, or jig. I made a smaller 90 degree angle piece to that I reused and clamped the larger pieces to to ensure the braces had a 90 degree angle.
- Wear safety goggles when using power tools.
- Keep a clean workspace. Sawdust can be slippery. Avoid accidents and issues by cleaning your space.
Since the flats we received had a pretty thin frame, I also reinforced them at the point where the braces where going to connect to the flats. We used heavy deck blocks, placed on top of the braces to ensure they will not tip forward.

Adding Visual Interest
So, now you have nice smooth painted flats with feet, so they can stand. This might be enough based on what the rest of your art direction looks like. You can add bookshelves with objects (relevant to the subject matter of your video), lights, framed pictures to the flats, vinyl decals, stenciled imagery, and more. Crash Course tends to make sets for their videos, so have a look at their videos, as well as others for inspiration.
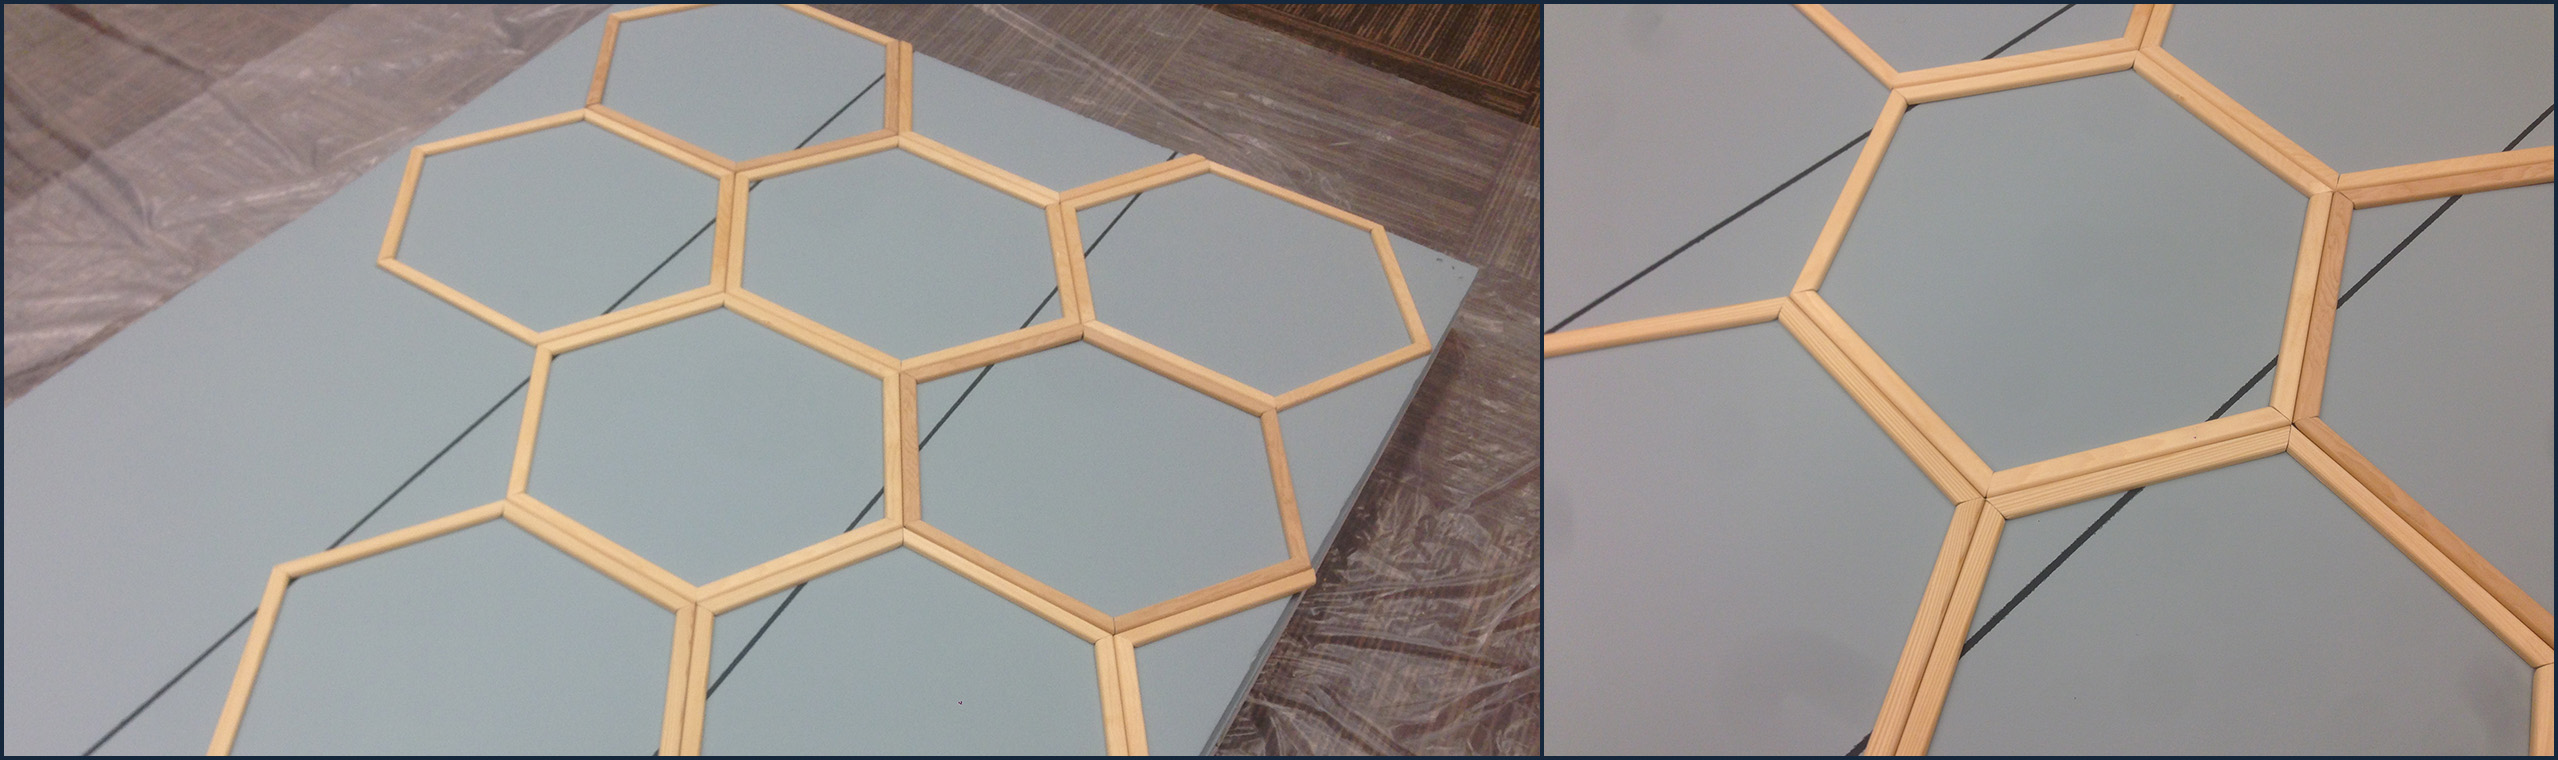
Don’t forget to draw inspiration from your subject matter. I was thinking of simple plain wood and glass insect display cases when I came up with concept of adding thin framed wood hexagons to one side of the set. In post-production (video editing) I’m going to add images and video of bugs into those hexagons, so they can change per lesson.
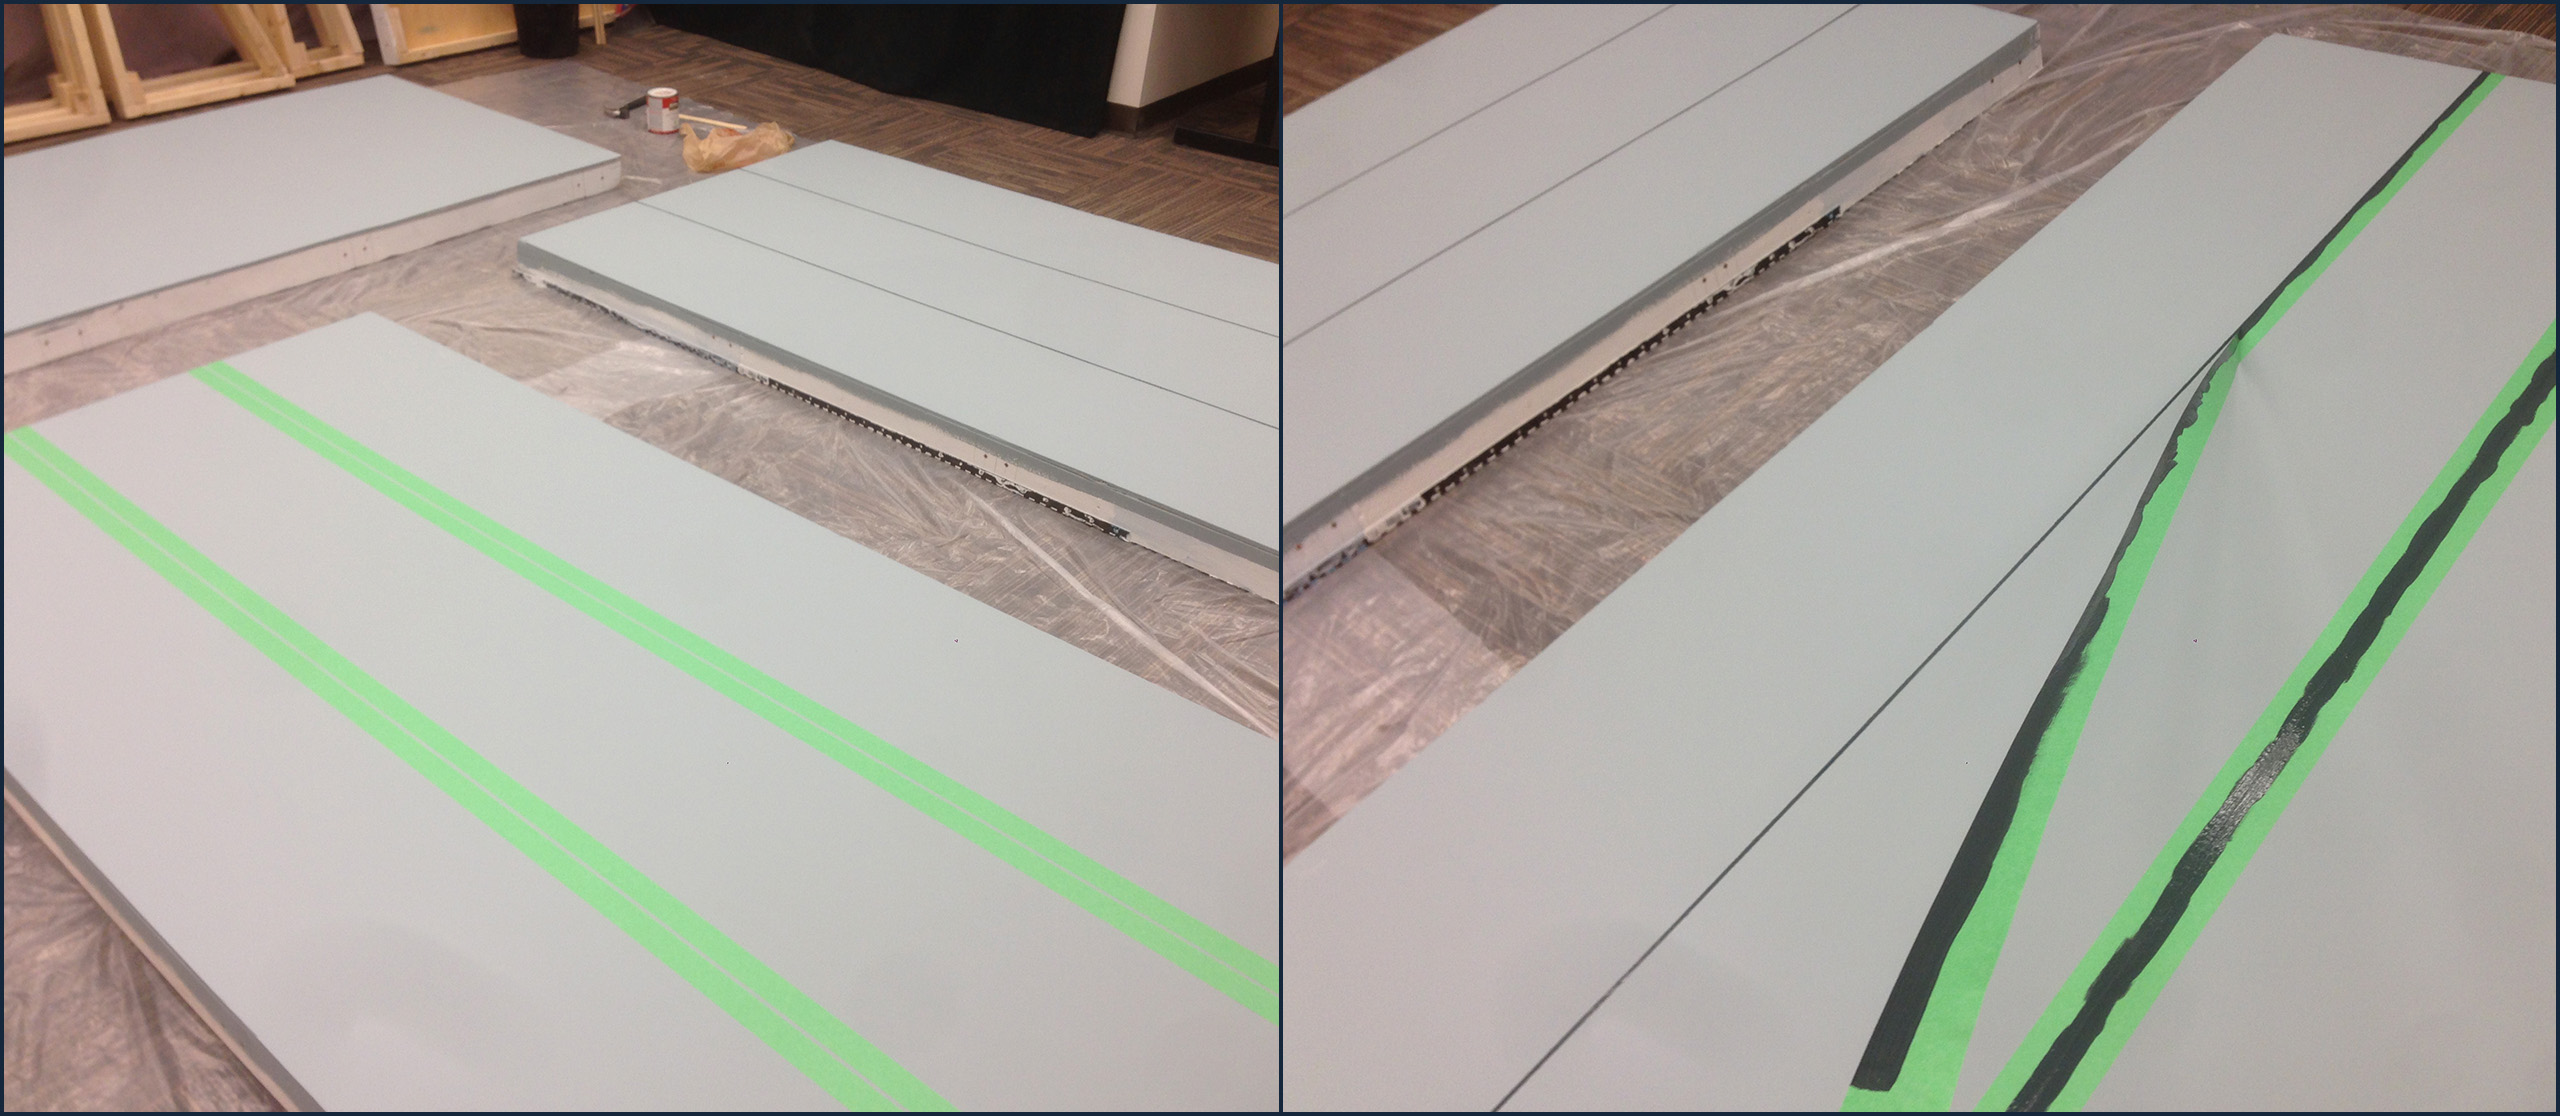
I also added thin dark blue stripes. These mimic the space between the flats, making them seem like one continuous wall instead of 4 separate flats.
